I created an interactive environment as a response to the brief. The environment included optimised, modular assets like a wall piece, a floor piece, a ceiling piece, an interactive door and door frame, and an interactive boulder. The interactive door would open when you get close to it and the boulder would fall and smash on the player. the brief stated that the environment needed to include a modular design and workflow as well as interactive elements.
I developed and refined a previsualisation in the real-time engine, Unreal Engine.
The real-time engine allowed me to construct a scene using the imported modular pieces and easily create interactions and export a fly-through video.
I created repeatable instances of assets, specifically floor, wall and ceiling pieces, and procedural materials sourced from textures.com, to quickly and efficiently populate and make changes to my real time environment.
I explored a variety of methods to produce visual effects, through the door opening trigger animation and the rock fall trigger animation.
I constructed triggers for events, animations and interactions to augment the intended audience experience of an interactive narrative environment, specifically the door opening trigger animation and the rock fall trigger animation.
I demonstrated camera and lighting techniques in computer-based software, through creating an animated camera with the fly-through animation and including lights in my scene.
I produced outputs that successfully met the brief set by the facilitators.
The specialisation I chose to do was about 2D character animation, specifically facial animation. This included designing a character and deciding on what actions they should perform in order to reflect a personality. I went for a young female character with tan skin, wavy brown hair and large blue eyes. The personality I tried to construct was friendly, flirty and cheeky.
My Performance
my behaviour: I didn’t start early enough. I underestimated the difficulty of the task and it took me a long time to decide on a project to work on which negatively impacted on the outcome. The scope of the project outweighed the time I had allocated to it.
my process: I used Adobe Animate to draw a woman’s face on a front view and then again on the profile, then adding some frames for in-betweening. I used multiple layers to create the animation, some layers for outlines, and some for colour. By working in this way I was able to manipulate the frames easier. I decided to add a couple of blink frames and an open mouth toothy smile to give her more personality and life. I later arranged the animation to begin from the side view and turn to face the front and finish with turning away again.
the outcome: I was able to complete a short 3 second animation that can be looped. I was not entirely pleased with the amount of work produced and the full potential of the project had not been realised. Also the animation could be smoother with more in-betweens. However, I believe the skills acquired by creating this helped me understand the principles of animation and the process of key-framing and in-betweening, as well as developing my character design skills. My main aim for this project was to expand on my drawing and illustration skills to create an artwork that is animated and has life. In this endeavour I believe I was successful but I still have a lot of learning to do before my ambitions become realised.
Objective: Engage in interdisciplinary practises while developing and sustaining teamwork skills. For the first task, I chose to participate in creating a gaming user interface, sound tracks and sound effects for a games student’s assignment. The second task I completed was creating an emoji for an app developer creating an app of mythical creature emjois.
TASK 1
Game Plan:
I met with Bailey, who is the games student and we discussed the plan for the game. He told me about his vision, and the roles he wanted me to play in the process. His game is being designed to be used on smart phones. This was an important piece of information and will determine a lot of the choices we make throughout the design process.
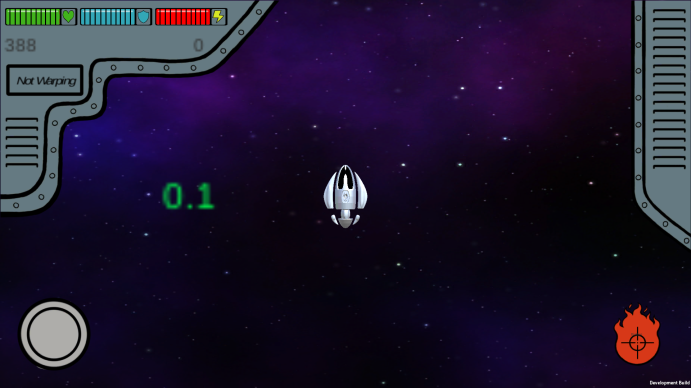
It is a shooting game, where you are viewing the galaxy and the spaceship that you control and use to shoot targets.
My assignments were to create a user interface, and be responsible for the backing track and sound effects. Baily gave me guildelines to follow so that I could stay on theme with his game. He wanted an industrial and sci-fi style user interface. He asked for the following:
Health Bar
Energy Bar
Shield Bar
Thumb control toggles
Fire buttons
With 3 levels on intensity
Loading button
Decorative features
New game and redo game icons
I found a few references on styles I wanted to recreate, see below:
I confirmed with Bailey that the ideas I had were appropriate with the style of game he was hoping to achieve. He agreed. So I was able to begin designing.
The design process was very enjoyable, and with each section I completed I communicated my progress to Bailey and asked for any feedback. He was continuously happy with the work I was producing, so I was able to keep going without many changes.
I sourced a backing track online and Baily and I both agreed it was appropriate with the theme of the task and worked well.
For the sound effects, I found a website that allowed you to create sounds that you could then download. This part was fun, and made me excited for when the game was finished. These were the sites I visited and the references I used.
The Grey circles at the bottom left are the thumb controls. The fires are the three different shooting options. The three coloured bars are representative of the shield, health and energy levels, and will be over the top of the grid above them. As the respective bars deplete, you will see the red bar underneath them, filling the bars remaining. These will all be scaled down and placed over the grey panel in the top left of the screen. The bottom right corner is the three parts to the loading display image. The grey will go under the blocked out circle, and the green section will rotate around the circle while it is loading.
The first icon is the play icon, the second is the redo icon
Reflection: The communication between Bailey and I was excellent. We are great friends so It was easy for us to clearly explain our expectations throughout the whole process. I believe I was able to achieve the outcome he had contracted me for, to a high standard.
TASK 2
Game Plan: Zac is another gaming student I know. He is creating a smart phone app of mythical creature emojis. My participation in this assignment was to create a dragon emoji. I met with Zac and he described the style to me, and I believe I got a clear understanding of the scope.
I drew a few concept sketches. See below:
I then came up with a design and showed it to Zac. See below:
Zac said that this wasn’t the style he was after, and wanted something a bit more cute and playful.
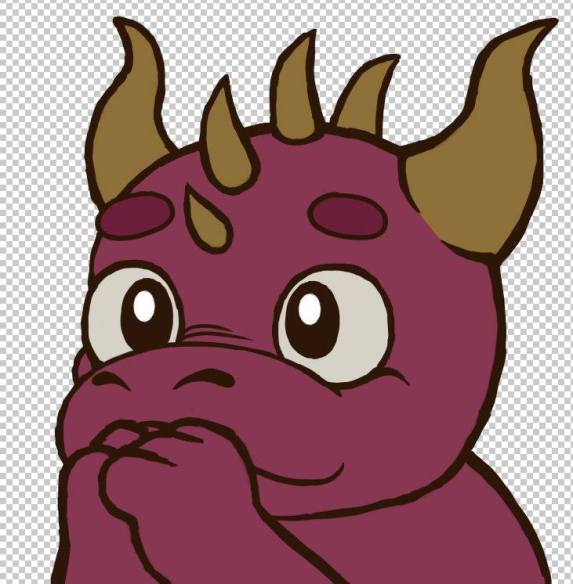
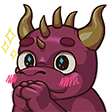
I redesigned the dragon and showed Zac the basic version before I took it any further, to make sure I was on the right track. See below:
Final Deliverable:
Zac asked for the images in different resolutions to make the image more versatile for his app.
Reflection:
It was hard to be told that he didn’t like my original concept because it was what I had imagine the dragon to look like from our original meeting. But I was able to understand that it was his vision, and I was able to recreate a new dragon that I was really happy with, and enjoyed making, that Zac was happy with. It was an interesting process because this is not a style of drawing that I do very often, but I am really happy with the final product, and my ability to work well with Zac throughout the process.
Overview:
I think that the two projects I worked on with gaming students was a total success. Both times we all worked really well together to stay on task, on theme and produce quality work with each other. I was happy with the planning meetings, the assignments I was given, the input they gave to me, and the final products.
Objective: Create a 2D animation of the character Yzma from the movie The Emporer’s New Groove, as she travels through an obstacle course. Portray her personality with animation techniques and physical mannerisms.
Game Plan: To begin, I researched Yzma’s mannerisms to gain an understanding of how she walks, jumps, falls and behaves. This allowed me to predict how she would respond physically throughout the obstacle course.
I chose to select a few reference images that I kept with me at all times to make sure I was accurately representing her shapes and posture. I found her character extremely fun and comical to draw.
Then I needed to plan out the obstacle course, and how I would have her travel through it. There was many different challenges that I thought of taking her through. See below:
I wanted the audience be able to know it was Yzma without being told, and without drawing her face to give it away. All the obstacles I tried to think of, were so to help me carry out this plan.
When I have established the obstacle course layout, I began to draw the slides.
Drawing out the slides was the most time consuming part of the project, however the most rewarding. It was great to see each section come to life as I drew more and more frames into the action. Yzma is definitely one of my favourite characters, so I found this part very enjoyable.
After I had drawn out the slides, I fixed the timing, and realised that I needed to add a few more frames into each action as the animation was a bit jumpy. Adding 3/4 new frames into each action allowed a much more smooth transition of movements.
When I showed the animation to a class mate, he suggested I add some music, so I did, and I think this gives it a great new element.
Reflection:
Firstly, I loved this assignment. Watching this movie growing up was a large reason I wanted to get into animation in the first place. Creating my own version of my favourite character was so much fun, and when you enjoy your work, is it really even work?!
There was a large list of ideas that I had, that I wasn’t able to execute. These were all things that I believe would’ve helped me create a more crisp character, and a more refined obstacle course, however I was time sensitive.
Some ideas that I was not able to complete were:
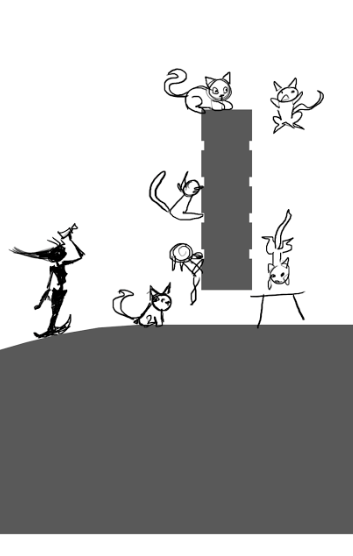
I really enjoyed this idea of having Yzma drink o potion that turned her into a cat, allowing her to jump over this obstacle. If I could do this over again, I would allow myself more time to carry this out. I think that this action shows a comical side of the character, and her hilarious way of problem solving.
The potion would’ve been a fun thing to animate. Doing a puff of green smoke and some sparkles in the air or something could’ve looked really good. But again, it wasn’t possible because I didn’t allow myself enough time.
The frames of her transforming from a human into a cat would’ve been really difficult, but fun to try. Definitely on the animation bucket list.
Another thing that I wanted to do, was make Yzma’s fall from the cart a bit more exaggerated. I had hoped that when she fell into the cart, she would completely flatten, and the cart would flatten, and then they would bounce up and back own again. This would’ve made the slide more true to life. Then I had the thought, that maybe she float down, swaying as she came down flat like a feather. This would be very comical, and true to the film that portrays her to be a frail skinny old woman. However I was again cut short for time on trying to execute those actions.
I think that even though the assignment has been submitted, I would like to add more audio to the file. This will polish the animation I think, and definitely create a deeper link tot the movie. Then, I think it would be a great piece of work to add to my port folio.
I did encounter a few technical difficulties during the animation process. I had been working on the drawings for a while. Then had a break for a few days. When I came back to it, I wasn’t able to get the brush size to mimic the work I had previously done. I emailed Katie White to ask for help, but she don’t respond so I was able to fix it by myself.. I’m not sure how lol but I fiddled with the settings and then it was fine again. I also was having issues with my graphics pad. It wasn’t responding and was very laggy Martin Buckingham suggested I open Animate before I connect the pad to my computer, rather than the pad first, and surprisingly, this fixed the issue.
Another thing that I wanted to play around with, was having the cart full of feathers. So that when she landed in it, the all flew up everywhere, and then as she proceeded down the hill, they all flew off with her. This would have been very good to animate, having the feathers move around the scene throughout the slide down the hill. This would have also helped to show how slow or fast she was moving, by what speed the feathers fell to the ground in respect to how fast the cart was moving.
The animation in the movie was a little different to the style that I chose to do. For example, there are many situations where Yzma is either falling or doing a cart wheel, and they chose to do a very blurred version of the action. See below:
For my work, I chose to draw out each frame to create a more smooth animation. This took more time, however I believe this was more affective. I chose to work in 2’s and 3’s, changing up between the two depending on how well the action flowed. I watched a lot of tutorials on animation and found that the ones who chose to do more slides, appeared more life like. That was the style I wanted to achieve, so that’s what I did! See below:
The underlining theme I wanted for the animation, was just for it to be entertaining. I think that I was able to achieve this. The entrance using the cart wheel was a great opener, I think. The cart wheel was fun to do. Some areas of her body had to be exaggerated in certain slides, which I worried about, but when you watch it back, it isn’t as noticeable as I thought it would be. I worried it would look disproportioned, but rather it just adds a comical value. I thing that I learned while doing the cart wheel that really helped me, was copy and pasting the left hand side of the cart wheel, and then flipping it to be the right hand side of the cart wheel. Saving time on this, allowed me more time to draw more slides so that it was more life like, and flowed better. When doing circular animation like that in the future, I will definitely do that again.
Overview:
I think that as a whole, I completed the assignment very well. I definitely slacked on the time factor, which left me very limited in my options of animation techniques. Next time I definitely need to make a weekly and daily plan of tasks to achieve so that I stay on schedule…but then actually stick to the plan. I have learned many new and great things from this assignment, and feel proud of the work I submitted. I found animation a lot easier than I thought it was going to be, I think that was partly because I enjoy drawing so much, that it was more fun than a chore. Animation is definitely a practise I hope to perfect.
I modelled & unwrapped assets: three Barrels (one with a tap, two without), a crate, a chest.
To begin, I scoured the web and found some pleasing reference images to base my models from.
Then, I made a rough first pass at modelling the assets, sometimes a second pass.
To finish, I made the final models and UV unwrapped them to be textured.
Researched and implemented vertex painting for blood splatters/pools.
Reflection
I feel because I was limited in the variety and quantity of tasks assigned to me, my contribution to the project was also limited (crucial but limited). This lack of involvement resulted in me being isolated from important events for the team as a whole and mostly being concerned with the immediate issues of the tasks I was working on at the time. Team members were poor with the communication aspect of the project and rarely kept the rest of the team updated with their progress and expectations of other team members. For example, some members, were working quite solo, and would upload their finished assets without any communication to the team throughout their work, or even after they had finished. On the other spectrum, if a team member (sometimes myself), would not attend class, they did not adequately question what it was they needed to be doing, and in turn, were not up to date with the teams progress. Towards the end, the biggest issue with the lack of communicate was there were times when tasks could not be completed efficiently because multiple people required the master-file. However, a schedule was established, in order for everyone to make arrangements to be available to work on the master-file on their given days. This played a huge role in the success of the completion of the assessment in the closing weeks.
I feel like my team as a whole were appreciative of my contributions. Initially, when I was absent at the start, they were fed up with me, understandably. However, as the semester progressed and I began to contribute more, they were very supportive. There was times when I would submit things a few days late, and they expressed to me their concerns, and the importance of dead lines, and together we were able to establish better expectations of one another, so that this didn’t happen again, and everyone felt like they were on the same page.
I feel as though I was not given a long list of tasks to contribute to the group assignment. I understand that this was because I was absent in the first planning week. However, while the list was not long, I still felt as though my tasks were time consuming, and involved extensive research and skill building on my part. A large majority of the time spent on the modelling section of this assessment was used getting myself acquainted with the programme and its functions. While modelling itself did take some time, there were many many hours behind the scenes that took place, including tutorials and meetings with my lecturers that were essential for a successful outcome.
It was overwhelming to start, when I realised that there was large portions of the work that I did not yet feel adequate to complete. It was crucial for me to master these areas before I could begin my work, and while that made me feel extremely anxious, I pushed through, and felt that my hard work paid off.
Plans & Pitches
How effective was the plan as a support tool and guide?
I was absent during the planning process. We did not refer back to the plan as a team since it’s creation. It was not formatted in a visually pleasing chart but a dull to-do style list. I believe that the plan was a failure as a support tool/guide. The team Trello board was used much more and was more visually pleasing and easy to modify than the plan. Although my contribution did look minimal when displayed like that even when many hours of work had been put towards the tasks.
How much the plan was followed? Why it was not followed?
The initial plan was followed, to some extent, that we had assigned roles and tasks and those tasks had to be completed by a certain time. The plan was, however, not referred back to directly and some of the tasks took longer than expected and in some cases I did not spend enough time on them to have them completed when they were expected to be.
How effective were your team’s pitches and presentations?
I was absent for most of the pitches and presentations. When I was attending, I lingered in the back of the group trying to vanish into the shadows or morph into the wall. Even in progress updates with the lecturers, I dreaded my turn to share progress because my input seemed so insignificant.
The lecture “Collaborating with Fans” stuck out to me because it allows an alternative to working for a studio or company and lets you work directly with the consumers of the product you are trying to make. This provides more independence and ensures the consumers get what they want. Once the task of building a substantial following is complete, they can be utilised to fund current and future work. This can be done through crowdfunding, a method for fans to contribute financially to a creator to support them in a project or their career and, in turn, receive agreed upon benefits. Websites such as Kickstarter and Patreon and examples of crowdfunding platforms. An example of successful crowdfunding was the Kickstarter game “Planetary Annihilation” developed by Uber Entertainment. It had a strong promotional video and a fun and unique twist on the classic sci-fi game genre which contributed to its success. The company tried to use the same method for their next project, “Human Resources”, another promising sci-fi game but fell short considerably of their target and the game was never made. This example highlights the limits of crowdfunding and while, if you can build a large backing, there are few complications, the potential of not meeting the target leaves the project abandoned.
I enjoyed attending the “Inclusive Design” lecture as our lecturer was engaging and was passionate about the topic. Because of this, I reacted to that enthusiasm and she piqued my interest. In order to make a piece of media inclusive, the artist must think about target audience and how they can make the media accessible and more appealing to everyone, challenging audience beliefs. When thinking about inclusive design, some points to consider, to make a colourful cast of characters, are race, gender, class, age, religion, disability (mental/physical), sexuality and body types. To make the media accessible for people with disabilities, there are other things that need to be considered. Animation being a specifically audio-visual media, people with blindness or deafness of some kind are at the greatest disadvantage. Some solutions to these barriers are: altering the hue & contrast of the visuals for people with limited vision and adding audio descriptions for blindness and, for deafness, adding closed captioning. The virtual reality game, “Moss”, features a sanguine character, Quill, a mouse who is mute and uses sign language to communicate. This allows the character to ensnare a larger audience and makes the game more inclusive to deaf and hearing impaired players. As well as introducing people who would otherwise not be exposed to sign language and deaf people to the community. However, he only signs in ASL (American sign language), therefore deaf people who use another form of sign language would still be excluded.
The “Social Media & Your Career” lecture was particularly intriguing because this is where I am currently in my career. Social media has become a massive game changer for creatives to showcase their work and network with others from their field. There are currently many social media outlets available such as Facebook, Instagram, Tumblr and Youtube to name a few. As a student studying animation, it is important to start promoting myself and networking with people within the industry to enable opportunities to establish a positive reputation. Showcasing my work will allow interaction with my online audience and enable feedback to improve my practice. As more people discover my work on social media, they may be inclined to promote and share my work for me to increase my fan-base/subscribers. One way of using social media to promote one’s practice is to take part in art sharing groups or competitions. This can be a great opportunity to go outside of your comfort zone and experiment with new mediums or concepts as well as gaining feedback and presence. Realising that now is the start of my career, I need to utilise friends and family to use word of mouth to promote my practice. Although, since I have already gotten my name out through illustrating a children’s book, that may be enough to secure a position in a studio or within a company.
:Image from http://www.generationnext.com.au/2015/05/finding-psychological-insights-through-social-media/
I modeled the chest using 3DS Max. I UV mapped the chest base and the side of the lid and did not complete the texturing so I used the colour palette as my texture. I used keyframes to animate the various components. I added lights and cameras to make the animation functional. I rendered the animation to jpgs and used Adobe Premier and added text.
The rigged 3D model is now brought to life. The most common method of animation is key-framing. This involves an action starting at key-frame A and ending at key-frame B using a timeline; for example, if you wanted to have a cloud move across the sky, key-frame A would be the cloud at its starting position and key-frame B would be the cloud at the end position. The animation software fills in the middle section, which can be edited such as the time taken for the cloud to move. This technique can be used for many different actions from facial expressions to explosions. Many individual key-frames can be used simultaneously to produce a complete scene by layering them together.
Rabbit Walk gif obtained 6/3/16, via http://3d-animated-gif.blogspot.com.au/2011_01_01_archive.html
References:
Boudon, Grant. “How Does A 3D Production Pipeline Work”. Digital-Tutors Blog. N.p., 2013. Web. 6 Mar. 2016.
Wiesen, G. “What Is 3D Computer Animation?” wiseGEEK. N.p., 2016. Web. 6 Mar. 2016.
Lighting
Lighting is crucial to create mood and realism within a digital 3D scene. It is implemented through various lights such as key light, point light, fill light, and rim light. Mood is created through the intensity, source and colours of the light, for example, a full moon dimly lights up a forest trail in a blue hue giving the scene an eerie feel. Lighting is also affected by the texture and material of the surfaces it interacts with.
Image accessed on 6/3/16 from: https://austinvisuals.com/how-2d-and-3d-animation-is-made-at-an-animation-studio-part-4/
“How 2D And 3D Animation Is Made At An Animation Studio – Part 4 | Austin Visuals”. Austinvisuals.com. N.p., 2013. Web. 6 Mar. 2016.
Rendering
Rendering is the translation of a shot from a mathematical model of vertices and polygons in a 3D space to a finalized 2D picture by the render engine. The incorporation of layout, shapes, textures, and lighting information establish the colour of each pixel in the final picture. This process can take an immense amount of time.
Slick, Justin. “What Is Rendering?”. About.com Tech. N.p., 2014. Web. 6 Mar. 2016.
Compositing
This is the final stage of the 3D production pipeline where all the pieces are put together. This stage is crucial for modern CG animation combined with live action filming where the layers of animated objects and characters, lighting and visual effects, and film footage are fused to create the final picture. Types of compositing include node-based, layer-based and deep compositing


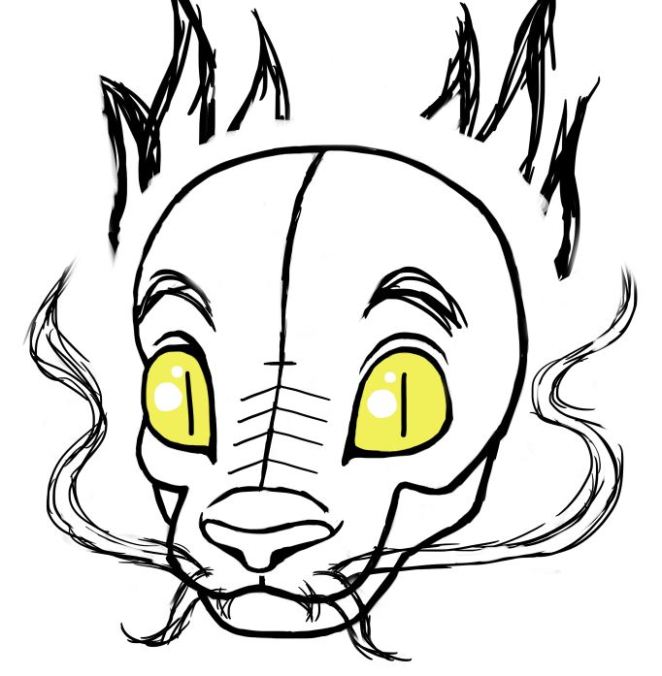


 I really enjoyed this idea of having Yzma drink o potion that turned her into a cat, allowing her to jump over this obstacle. If I could do this over again, I would allow myself more time to carry this out. I think that this action shows a comical side of the character, and her hilarious way of problem solving.


